Beekeeping is a rewarding hobby, but ensuring your bees have a safe and stable home is crucial for their health and productivity. One often-overlooked component of a successful apiary is a high-quality bee hive stand. A well-built stand keeps your hive off the ground, prevents pests, and improves ventilation.
But before you start building, remember: beekeeping safety gear—like high-quality beekeeping suits and the best bee veils for beekeepers—is just as important as the equipment you use. In this guide, we’ll walk you through how to construct a durable DIY bee hive stand while also highlighting essential beekeeping accessories for beginners to keep you protected.
Why a Good Hive Stand Matters
A sturdy bee hive stand is more than just a platform—it’s a key part of successful beekeeping. Here’s why:
Prevents Moisture & Rot – Elevating the hive keeps it dry, reducing wood decay.
Deters Pests – Ants, mice, and other critters have a harder time reaching the hive.
Improves Airflow – Proper ventilation helps regulate hive temperature.
Easier Inspections – A raised hive means less bending, making inspections more comfortable (especially when wearing beekeeping gloves and veils).
If you skip this step, you risk hive instability, infestations, and even colony loss. That’s why building a long-lasting bee hive stand should be a priority for every beekeeper.
Materials Needed for a DIY Bee Hive Stand
Before you start, gather these essential beekeeping tools and materials:
Wood & Hardware
Pressure-treated lumber or cedar (resistant to rot and insects)
Galvanized screws & nails (rust-proof for outdoor use)
Waterproof wood glue (for extra durability)
Concrete blocks or pavers (optional, for added stability)
Tools Required
Measuring tape & carpenter’s square (for precise cuts)
Circular saw or handsaw
Drill & drill bits
Sandpaper (to smooth rough edges)
Paint or wood sealant (optional, for weatherproofing)
Safety Gear
While building, it’s smart to wear:
Beekeeping gloves (to avoid splinters)
Safety goggles (when cutting wood)
A bee veil (if working near an active hive)
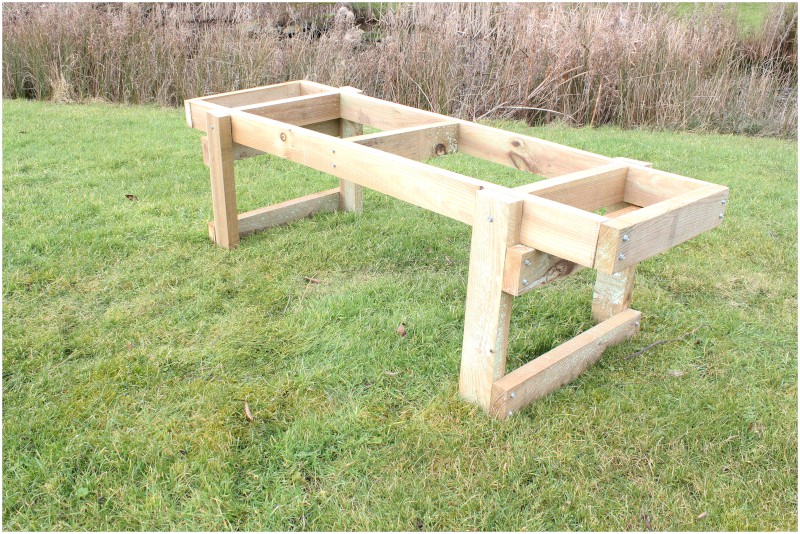
Step-by-Step Building Instructions
Follow these steps to construct a strong and stable bee hive stand that will last for years.
Step 1: Measure and Cut the Wood
Decide on the height (typically 16–24 inches for easy access).
Cut four legs (e.g., 4x4 posts, 24 inches long).
Cut two side beams (2x6 lumber, 22 inches long for a Langstroth hive).
Cut two front/back beams (2x6 lumber, 16 inches long).
? Pro Tip: If you’re using high-quality beekeeping suits, now’s a good time to wear them—especially if bees are nearby!
Step 2: Assemble the Base Frame
Lay out the side and front beams in a rectangle.
Pre-drill holes to prevent splitting, then secure with screws.
Use a carpenter’s square to ensure perfect 90-degree angles.
Step 3: Attach the Legs
Place a leg at each corner.
Secure with screws and reinforce with waterproof wood glue.
For extra stability, add diagonal braces between legs.
Step 4: Reinforce the Structure
Add cross supports between legs if needed.
Check for wobbling—adjust legs until the stand is perfectly level.
Step 5: Optional Additions
Landing Board: Attach a small plank at the hive entrance for easier bee access.
Paint or Sealant: Apply a non-toxic sealant to protect against weather.
Safety Tips While Building & Using Your Hive Stand
Even though you’re working with wood, beekeeping safety gear is still important:
✅ Wear a bee veil and gloves when placing the hive on the stand (bees may get defensive).
✅ Ensure the stand is level—an uneven hive can cause comb misalignment.
✅ Check for stability before adding a full hive (a collapsing stand could anger the colony).
If you’re new to beekeeping, investing in the best bee veils for beekeepers and durable beekeeping clothing will make the process much safer.
Maintaining Your Bee Hive Stand
A long-lasting bee hive stand requires occasional upkeep:
Inspect for rot or termites annually.
Reapply sealant every 2–3 years.
Keep the area weed-free to discourage pests.
Recommended Beekeeping Safety Gear
While a DIY bee hive stand is essential, don’t overlook protective equipment:
1. High-Quality Beekeeping Suits
Full-body coverage prevents stings.
Look for ventilated, lightweight fabrics.
2. Best Bee Veils for Beekeepers
Mesh should be fine enough to keep bees out but allow clear vision.
Adjustable hats ensure a secure fit.
3. Durable Beekeeping Gloves
Go for goat leather or puncture-resistant materials.
Ensure flexibility for handling frames.
Final Thoughts
Building your own bee hive stand is a simple yet impactful project that enhances hive health and makes inspections easier. Pairing it with reliable beekeeping safety gear—like high-quality suits, veils, and gloves—ensures a smooth and sting-free experience.
Now that you have a sturdy hive stand, your bees will thrive, and you’ll enjoy beekeeping with greater confidence.