Creating visually engaging content for your blog isn’t just about adding pretty pictures. It’s about knowing how to make those visuals work for you, supporting your message while keeping your audience hooked. We live in an image-driven world, and blogs that utilize high-quality images are more likely to stand out and attract readers. But here’s the catch: You don’t need to be a professional designer or photographer to create stunning visuals. With the right tools and techniques, anyone can do it. In this article, we’ll walk through how to elevate your blog’s visuals with simple yet effective methods.
Why Visuals Matter for Your Blog
Blogging is an art, but visuals are the brushstrokes that can turn your art into something captivating. Visual content is not only more eye-catching, but it also aids in communicating your message faster and more effectively. Studies show that articles with images get 94% more views than those without. Your readers are often skimming content, and if your visuals are engaging enough, they’ll want to spend more time on your page. But visuals are more than just decoration; they help break down information, evoke emotions, and keep your audience engaged.
So how can you craft stunning visuals for your blog without investing a lot of time or money? Let’s take a look at the process step-by-step.
Choosing the Right Type of Visuals for Your Blog
First things first: Not all visuals are created equal. Depending on the type of blog post you’re writing, the visuals you use will vary. Let’s break it down:
- Blog Post Headers: Your header images set the tone for the article. They should be relevant to the topic and visually appealing. Use bold, high-quality images that catch the reader’s eye.
- Infographics: Infographics are an excellent way to summarize complex information. They’re not only visually appealing but help break down data into digestible pieces.
- Screenshots: If you’re demonstrating a process or showing off a tool, screenshots are a great way to show your audience exactly what you mean.
- Stock Photos: Stock images can be great when you don’t have access to your own photography. But beware: overusing generic stock images can make your content feel impersonal and disconnected from your brand.
- Icons and Illustrations: These work well for tutorials or to highlight key points. They can be more personal and customized to match your brand.
Your choice of visuals should support the message of your blog post. Whether you’re telling a story or teaching something new, the visuals should complement that narrative. Now, let’s get into how to create and enhance these visuals.
Using Simple Tools to Create High-Quality Images
Gone are the days when you needed expensive software like Photoshop to create stunning visuals. Today, there are countless simple tools that can help you enhance your images quickly and easily. Let's look at some of the best options:
Canva
Canva is a widely popular tool that allows you to design professional-looking graphics without the need for design skills. With its drag-and-drop interface, you can create blog post headers, social media graphics, infographics, and more. It also offers templates to help you get started quickly.Pexels and Unsplash
If you’re short on original photos, both Pexels and Unsplash offer a vast collection of high-quality, free-to-use images. These sites are fantastic when you need visually appealing photos to accompany your content without breaking the bank.Snapseed
For those looking to enhance their photos even further, Snapseed is a powerful and free photo-editing app that allows you to adjust brightness, contrast, saturation, and even sharpen the image. With just a few clicks, you can take a decent photo and make it look much more professional.
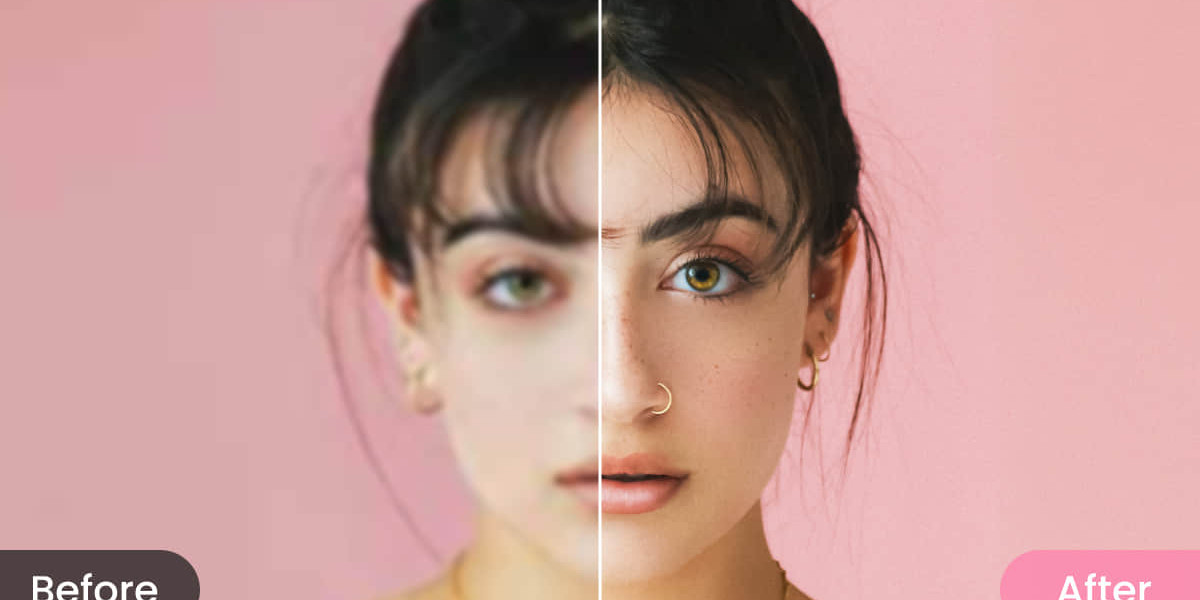
Now, for an even quicker fix, if you're dealing with blurry or low-resolution photos, consider using an image enhancer to sharpen and brighten them. Tools like Snapedit provide a fast and easy way to improve image quality in just seconds. This is particularly useful when you're in a rush and need high-quality visuals without spending hours editing.
Optimizing Images for Web Use
Once your images are ready, the next step is to make sure they’re optimized for the web. Large image files can slow down your website, which affects loading times and overall user experience. Here are a few tips to make sure your images are optimized:
- Resize your images: Make sure your images aren’t larger than they need to be. For blog posts, a 1200 x 800-pixel image is usually sufficient.
- Compress your images: Tools like TinyPNG can reduce the file size without compromising quality.
- Use the right file format: For most blog images, JPEG works well for photos, while PNG is great for images with text or graphics. Avoid using GIFs unless necessary.
- Alt text: Don’t forget to add alt text to your images. This not only helps with SEO but also makes your blog accessible to visually impaired readers.
Making Your Visuals Consistent with Your Brand
Consistency is key when it comes to branding. You want your visuals to match your blog’s overall tone and style. If your brand is modern and minimalist, keep your images clean and simple. If your brand is fun and colorful, don’t be afraid to use bright colors and quirky designs. Using a consistent visual style helps reinforce your brand and makes your content instantly recognizable.
One way to maintain consistency is to create a visual style guide. This might include preferred colors, fonts, and the types of images that best represent your blog. Once your visual style is established, it’s easier to create content that feels cohesive and aligned with your brand.
Conclusion: Enhance Your Visuals and Watch Your Blog Shine
Great visuals can significantly improve the look and feel of your blog. From picking the right images to optimizing them for web use, you have everything you need to make your blog visually stunning without needing to be a graphic designer. Don’t forget, if your images need a little extra boost, using an image enhancer like Snapedit can quickly improve their quality. By following the tips and tools mentioned here, you can create blog visuals that engage readers, support your content, and elevate your brand. Happy blogging!